This was a pretty spontanous production inspired by a big clean-up
operation by our special camera guy and editor Sylvio from
Granmidia.
He found lots of headphones used for studio production and thought
we could give it a spin and maybe a funny twist here in
the IoTempire. I threw in a couple
of my own as well as a little surprise, and we were ready to shoot.
Unfortunately, it got a little longer than expected,
but we think there are still lots of funny moments to explore.
Do you like the reviewing style?
Do you want more like this, anything special in tech to
be tested and review? Let me know in the
video comments and subscribe!
Finally, some time to take a look at all the tech that came in recently.
Join me on this little (hopefully entertaining) journey to
unpack everything and please
share your ideas what you would like to see me build next with all of
this.
Do you like our unboxing style?
Do you want to be able to build your own phone? Let me know in the
video comments and subscribe!
I recently acknowledged the fact that I had 70 tabs open in Chrome on my Desktop and 110 tabs open on my mobile firefox browser.
Even using tab-suspend plugins like described
here did not hide the fact that I was starting to create quite a browser mess here.
Being sometimes kind of old-school, I thought: great, let's tidy all up and sort them into bookmarks. However, open tabs have some kind of to-do status for me and I didn't want to lose this to-do idea. So I could not just file them away in folders, but I needed a tagging function to sort one and the same tag into several categories.
Unfortunately using bookmarks is deemed kind of old-fashioned today: Why bother remembering if Google can not find it easily anyway? Therefore old folder structures exist, but the ideas of tags and categories only attracts very few people and therefore is also not well supported by the open source community.
The desktop version of Firefox though, does have a nice tagging feature. Chrome does not (apart from some less than well supported extensions). Therefore, I decided to export all my tabs and switch - after a long time using Chrome - back to Firefox again. It took me a couple of ours to tag them all, but soon I had easy access to them on the Desktop.
I even activated Firefox Sync and wanted to start using all my to-do-bookmarks on the road. How stupid of me? I actually assumed bookmarks on Firefox for Desktop would work similar to bookmarks on Firefox on Mobile - stupid me, these are two very different pieces of Software! OK, no way to access and search my tags on Firefox Mobile.
What now? Another look at extensions. While trying some extensions, I had to learn that Firefox is just moving on (again and again) to a new extension (web extension) system and therefore soon all of the plugins will not work anymore - ah great, that was actually why I did like Firefox.
Being very annoyed, I started focusing on Chrome plugins again and started looking at options how to extract all my bookmarks and tags back out of Firefox. Fortunately, Firefox has a json-export option, which I gladly used. Now I had all my bookmarks and tags in a format, I could read and read out with some little Python-magic.
However, I did not like the idea to re-import them into proprietory Chrome and risking losing them again - so I looked at other options to manage bookmarks. I stumbled on a really nice project:
https://github.com/jarun/Buku
A command line bookmark manager which even has several extensions - that sounded interesting. As excited as this person here, I installed it and wrote a small script to feed my json bookmarks into buku:
importjsonimportsubprocessdeftraverse(bm):ks=bm.keys()if"uri"inks:title=""uri=bm["uri"]tags=""if"title"inks:title=bm["title"]else:keys=bm["keys"]if"tags"inks:tags=bm["tags"]print("buku -a \"{}\" --title {}{}".format(uri,title,tags))subprocess.call(["buku","-a",uri,"--title",title,"--tag",tags])if"children"inks:forbinbm["children"]:traverse(b)bm=json.load(open("bookmarks.json"))traverse(bm)
That was not that hard.
Now, I just needed something to easily search and create these bookmarks.
For searching, I installed oil: https://github.com/AndreiUlmeyda/oil
And for editing, I connected this little script to Super-Shift-B:
Replace the terminal with a terminal of your choice (not gnome-terminal as it doesn't behave like a regular unix program). When in a browser, it focuses on the url-bar (ctrl-l), copies the url, and then opens it with buku in a terminal.
Great, I am finally back and can edit and probably even synchronize my bookmarks, both on my Desktop and on my phone. Furthermore, I can easily extend the mechanism and eventually also add a snapshot function.
This is a follow-up of my
recent command line-editor review here on my blog. There, I was looking at
nice edit (ne),
micro,
and kaaedit.
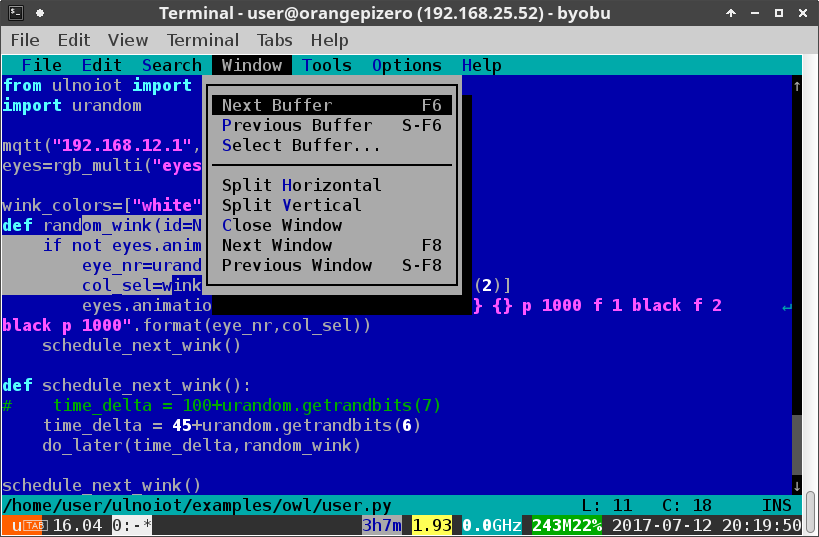
As I was teaching recently a new Internet of Things (IoT) class -
Home and Building Automation, I was looking for simple to use command editors for my new IoT framework
ulnoiot.
emacs and vi were not "comfortable" enough to expose my students to. Having to use git, ssh, and the command line was enough of a challenge to pose, so I wanted to go easy with the editor. I wanted something that behaved very normally and transparently even in the remotely accessed command line. It needed to even support the mouse.
Therefore, I had these new requirements:
Comfortable
Having something menu-like to select commands from
Allow cut, copy, paste, and quit with ctrl-c, ctrl-x, ctrl-v, and ctrl-q
Support for mouse/touch cursor positioning, mouse selection and
menu navigation even when using ssh (from any os:
Windows, MacOS, Linux, Android, iOS)
Linewrap without breaking the lines
Syntax highlighting
Enough performance to work comfortably on a Raspberry Pi 1 or
the Orange Pi Zero
As just mentioned, vi and emacs didn't qualify for point 1.
I took a look at spacemacs and some extra configurations which made emacs qualify for all points, but point 5.
Therefore, spacemacs might be a nice choice on a
beefier single board computer or when using ulnoiot on a laptop or desktop, but it really felt sluggish on small Raspberry Pis or the Orange Pi Zero.
The same is unfortunately true for micro - I wonder how it can be so slow as it should actually be compiled in go.
kaa and ne, both don't support mouse integration (point 2).
After quite some tinkering and tweaking of configuration files, I managed to get mcedit to behave like a comfortable editor (use
this configuration for CUA mode), passing all 5 requirements but 3. I also looked at tilde (described later), but I could not manage to compile it on the arm based single board-computers, so I had to relax requirement 3 for my class and used mcedit.
tilde
Meet tilde, an underrated great command line editor which just works as you expect it to work. Check it out at: http://os.ghalkes.nl/tilde/
It is extremely fast, very low footprint, and integrates all before-mentioned points.
You also find binary versions for all major distributions. This makes installing tilde in these distributions very easy.
However, they are only available for desktop platforms. If you are not running Arch-Linux on one of these other platforms (which compiles it directly from the AUR), you have to compile it yourself.
I had quite some trouble compiling the developer version of tilde (I even opened an issue for that
here). However, after some trial and error, I managed to compile tilde, both for the Raspberry Pi and on the Orange Pi Zero under armbian.
If you want to compile it yourself just install ulnoiot, enter its environment and type install_tilde or modify my install_tilde script to suit your own environment.
I think, this solves my command line editor hunt for a while. On the fly spell checking would be nice (yes vim and emacs have this, I know), but I would love to see tilde to show up more often as the command line editor default. I will definitely use it a lot in the future for my teaching.
I just finished teaching another iteration of
Home and Building Automation
at the FH Upper Austria. It is one of my favorite classes - and gaging
from student feedback the appreciation goes two ways.
Some of you might know that I have started to develop my own Internet of Things (IoT) framework, still called ulnoiot. It is available on github at http://github.com/ulno/ulnoiot.
Teaching Home and Building Automation allowed me to vet the framework
the first time in a teaching setting, and I am very pleased by the results.
A key feature for me in teaching IoT, is not only teaching the programming and integration of single devices, but the connection of all these devices into one system. Starting with my PhD on configuring smart home systems, I have always claimed that applications which are based on a network of sensors, actors, and other virtual software components inside the network or in the Internet/cloud only become interesting and an eventual economic opportunity (some have called it the killer app), when they cross several domains:
Nobody is interested in replacing their existing lighting at home with smart bulbs if you cannot combine it with the house security (away automation and remote control), entertainment (mood lighting), or data analytics (power consumptions, behavior patterns, prediction). As soon as we cross different domains, applications become interesting.
ulnoiot is designed to allow building such domain spanning automation systems from the ground up for a very low price. It is further designed to lowering the entrance barrier and programming level to a very manageable level, also for beginners and being easy deployable in a class setting.
This class had 19 students. Each of the students received one Raspberry Pi with wireless capabilities (Pi Zero W and Pi 3 have this built in, older Pis need Wifi USB sticks). The students connected these to the local ethernet network or using their tethered cell phones as input wifi and therefore had each their own advanced wifi-router running all necessary IoT gateway software and a simple pre-installed development environment. Students could now use their laptops or tablets to login to their personal wifi-router and then access the installed environment via ssh.
ulnoiot on the respective Pis also allowed the students to flash microcontrollers (we used the Wemos D1 Mini and olimex development board - both based on the esp8266). ulnoiot uses a modified micropython environment which let's you define a networked sensor or actor in just 3 lines of code. This is the program for building a simple networked touch button. This can be entered interactively, while being logged into the microcontroller. All commands can be looked up from a help system, which is installed on the microcontroller.
mqtt("ulnoiotgw","lab1/test")button("b1",d3)run()
Inspite of only 3 weeks of teaching, students came up with very compelling final projects, all showing off at least four different domains. One of my student group built a complete simulation of renting out rooms of a big apartment on airbnb with complete diy smart-lock, remote access control, tenant based smart audio, and diffrent levels diy remote security featuring mostly sensors and actors running ulnoiot.
Student commitment did not only stop there, they also filed bug reports (letting me advance ulnoiot) and even programmed their own mqtt drivers (i. e. for reading NFC tags).
A big thanks to my students. I am looking forward to my next project or class, featuring ulnoiot. If you want to try it, get some supported hardware at http://ulno.net/iot/hardware and start downloading http://github.com/ulno/ulnoiot.
I can already see the comments: Why are you so cheap? You Open Source addict! Use Google!
But it's too late. I ran into their trap as I wanted to be modern with my students.
So, what's this all about? I asked my former students who are now working in the development world what they are using for managing their team communication. And about 90% recommended slack.
So, I took a look at it, it seemed most functions where free, it was easy to use and it seemed what I needed to manage my class. Therefore, I gave it a try.
It worked very well in the beginning, but after about a third of the class it told me that I wasn't allowed to check the history anymore if I wasn't willing to start paying. That was particularly annoying as I needed some data to do some grading and now had to dig these up elsewhere. As the payment for an adjunct professor in the US is extremely low, I didn't want to shell out this money as I thought
I was doing a favor to slack introducing it to my students.
After my class finished, I was hoping that I could at least export the information and then parse it myself. It turns out that slack only export public channels. Private channels I created will not be exported so its information is lost to me forever. Very annoying.
So, if you run a non-profit, educational, low-budget, or academic project: DO NOT USE SLACK!
You will lose your data and records if you are not willing to pay and you will only realize this when it is basically too late and your are trapped. It is very sad to let these communications of my students and their work progress go, but at least I have learned to be more careful.
Better host your own solution - maybe run your own IRC-server, hangouts, maybe Gitter is a bit more fair regarding history, but slack, no.
Congratulations, slack, you tricked me! At least state this clearly when you open up a community: "Hey there, soon you will not be able to access any history if you don't start paying right away. This free thing is just a very crippled version, you should not even consider using in a productive way."
I do understand and encourage that you want to make money with a service, but please clearly indicate that right from the start and don't trick your potential customer into something. This is in my opinion fraudulent behavior, which I cannot endorse.
It has been an intense but fun 16 weeks teaching my first
Software Architecture class at
George Mason University (GMU).
I want to thank my colleague Jeff Offutt for the encouragement to
update the course content and give it an agile twist. And of course,
I want to thank my students for encouraging feedback and energy to making this a success.
In the first half of the class, we went through most of the UML
specified software architectures and diagrams, and stressed the
importance of good requirements engineering and using scenarios,
stories, and business cases as artifacts to coordinate development,
reflecting my research in
Story Driven Modeling
and using sdmlib to
support this development paradigm.
In the second part of the class, we developed in two scrum teams open source software for running a bank (at least its transaction based part).
In my life as an entrepreneur, I was missing several times a small easy to configure bank transaction software to make compelling presentations for potential investors and clients.
Banking scenarios are frequently used in software engineering
and software architecture text-books,
(who of my colleagues does not hate the theoretical automated teller
example?)
but due to lack of open source code, any real analysis and hands-on improvement is impossible - resulting in a very theoretical and dry lecture. I hope this can change now.
We used the two classic roles of scrum master and product owner but also added a software architect (or architect owner). Team sizes were 10 persons each and both teams delivered astonishing results.
Some of my students committed to do some curating to the projects to keep it alive as a professional reference for them. Maybe some of my readers here take an interest to fork and extend one or both of the projects. I definitely encourage everybody to take a look here:
Check them out, comment here or on github, encourage my students to continue, contact them on linkedin, hire or contract them and hopfully, we will all see some of these projects being re-used and improved in other projects, pitches, or classes.
Please let me know if you took an interest or successfully deployed it for one of your own projects. If some of my students wnat to comment here, feel free to do so - any comments are welcome. You can also comment anonymously.
Thanks again for the great class to GMU and their excellent students.
I am talking today at the Analytics Seminar at Georgetown Univesity,
Washington, DC. Check out my slides
here.
Abstract:
DIY technological devices, making, and hacking are becoming more and
more accessible for anybody. Especially for creating your own data and
doing your own analytics this trend offers exiting opportunities.
In my talk, I will focus on a $3 wireless microcontroller based on the
ESP8266 (the same chip which is used in the Amazon Dash Button) and
the Raspberry Pi Zero W, which is sometimes available for $10. Both
support wireless connectivity. Therefor, they are considered Internet
of Things (IoT) devices.
I will show you some examples of very affordable and easy to build
wireless DIY data collectors involving these chips and how to build
and configure these in practice. I need you to interact with them live
in class to generate some data so we have something to visualize in
the end of the class. I will also show you the Python-based and
therefor very accessible ecosystem I put together around these
devices.
I hope, I will be able to spark interest in replicating some of the
presented ideas or come up with new ideas during the discussion.
I am presenting the following data collectors
(most based on the Wemos D1 Mini):
Temperature/Humidity based on DHT11
Temperature precise
Tilt “drink frequency” sensor
Noise sensor
Obstacle detection
Knock sensor
And an outside temperature/humidity/vibration/noise sensor
based on a Raspberry Pi A
My daily driver phone at the moment is a Google Nexus 6P. It is the last of Google's true Nexus phones, so it is especially nice if you want to do some Android development and have more recent ROMs and access to new Android features.
It is also a really nice option if you want to have very affordable worldwide cell and data coverage with Google's Project FI which requires you to have a new Nexus Phone or the its successor, the Google Pixel. The difference to the Pixel does not seem so big, however, the 6P has a major downside: it runs a Snapdragon 810 which (under load) overheats even more than other cell phone processors.
I felt this issue very often - the phone was behaving sluggishly, felt hot in my pocket- and in addition I got a very short runtime (often less than 10 hours without re-charging). However, lots of people report very few overheating issues on the Nexus 6P and advise against an upgrade to the Pixel as not being worth it.
So why would mine have it? There also seem to be a lot of reports around battery drain on the Nexus 6P, especially after upgrading to Android 7 (Nougat,
read here), but I really feared upgrading as I already had these problems under Android 6. There is now even a class action lawsuit building up against Google and Huawei (more here).
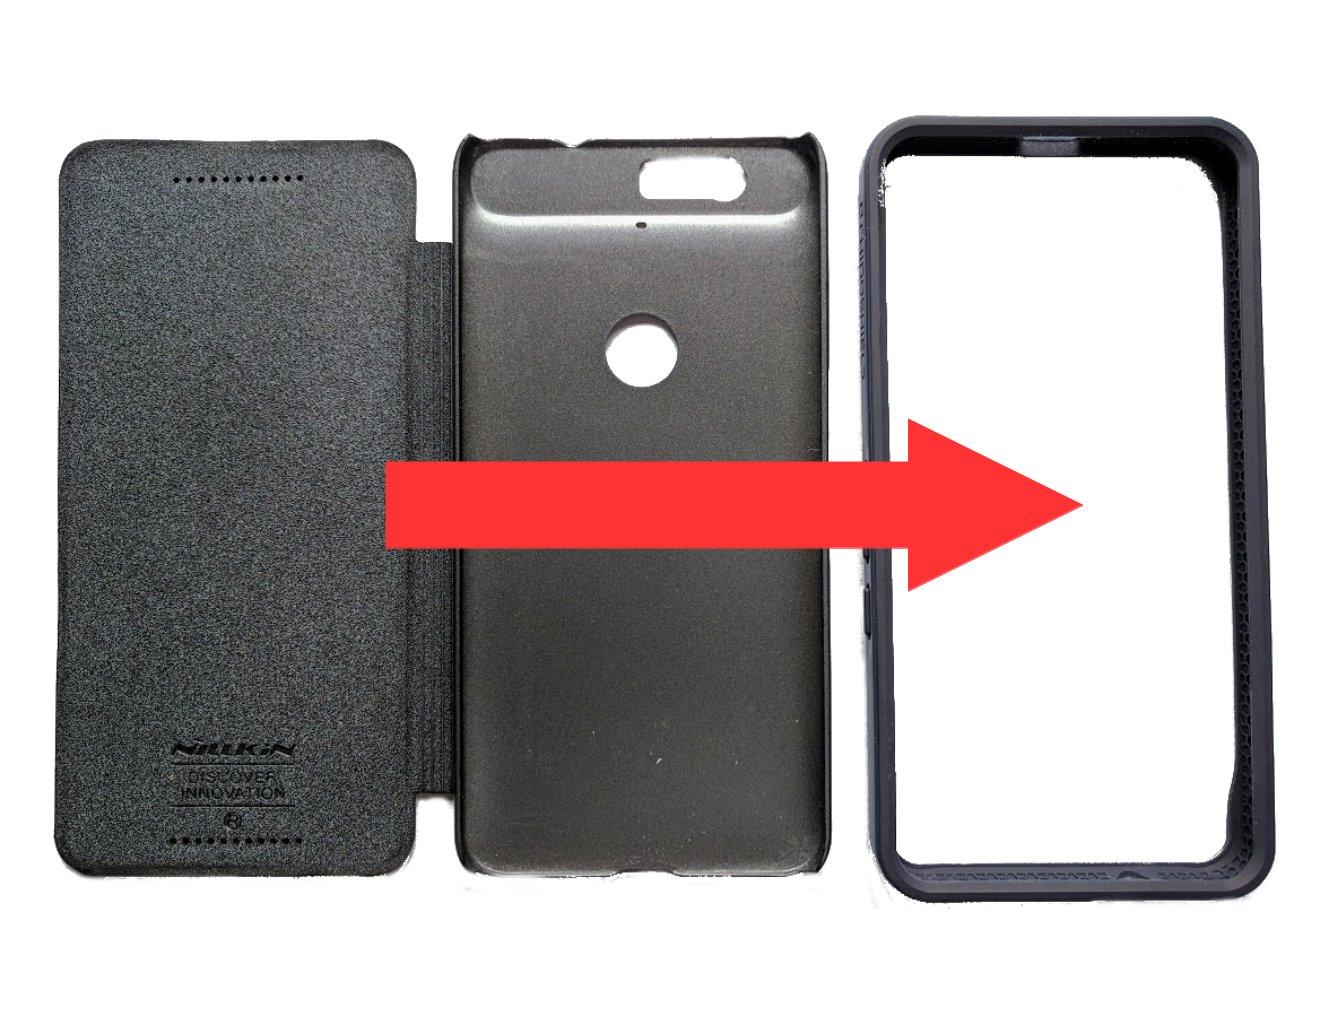
Basically motivated by the hot phone in the pocket, I was thinking if my case could be the problem, The Nexus 6P has a nice metal body, so I thought if there was no or a very thin case it might allow much faster heat dissipation. I was using a flip case for the Nexus 6P , the Nillkin [Sparkle] Nexus 6p Flip Cover Folio case. It had a really nice grip, was pretty light and protected of course the whole phone - being a flip cover. I switched to a pure bumper case from RhinoShield and I was nothing short of impressed: it seems that nearly all my battery drain and overheating problems are gone. I have on average 3-6 hours more of battery life. It now looks usually like in the following image. The stuttering still occurs sometimes but also much less often.
So, of course this experience is not a big study, but maybe some of the people investigating the lawsuit (and maybe also Google and Huwaei) should check if there is actually a correlation between the drop outs and drains and the cases teh respective people use.
If you have a 6P, I would love some comments on your personal battery and overheating experience, and please take the phone for a day out of its protector (be careful though) and check its runtime.
Products discussed in article and links to buy them:
The Nexus 6P is still quite a bargain (especially when using the correct case). Check for example these offers out here: Nexus 6P $300-$450/32GB-128GB.
You might have to add a screen protector when moving from a flip case to a bumper. These are the best protectors I ever had as they really reduce glare on the phone and make it possible to use the phone better outside in the sun:
Mr Shield (5-Pack) For Nexus 6P
In February 2016, one of my Maker friends in Jakarta, Indonesia pointed me to an offer
of an all-in-one PC too hard to pass up. It was a GULEEK i8 with Intel Quadcore Atom processor
(Baytrail), 2 GB Ram, 16Gb ssd, built-in battery, 2 USB 2.0 Ports, micro sd-card reader, Windows 8.1 pre-installed. The whole package sold for incredibly low $70 a piece.
I was not so sure that Windows 8 would perform well on this, so I did a little
Internet research and found a couple of people successfully running Linuxes
on these machines. I thought these might make great powerful replacements
for some of my Raspberry Pis. Especially, if I would not need graphics and
ran them headless -- what did I know what I asked for there - see below.
We purchased 3 pieces of this, they arrived two weeks later.
My friend tried to upgrade one of them to Windows 10,
but had trouble due to space limitations. I installed Ubuntu
on the other two (after making a backup of the disk to be able to go back to Windows),
having only to replace the 64 UEFI boot loader with a 32 bit one.
However on one of the two remaining GULEEKs the Display started to fail - it was just not possible to get an HDMI-out signal anymore.
There are several instances in the net where this is described
(search for guleek i8 no display), but no consistent solutions.
The problems also seem to be not Linux specific, so it seemed to happen
in Windows too (I restored my windows image, but to no effect - not sure
if it really booted up again though).
Usually it is suggested to try to connect the failing GULEEK to different screens,
let the internal battery drain, and connect another day to check again.
And I have to admit on some random occasions my display came back,
but it was lost
very quickly again soon after. So, I was forced to find a solution
to drive this device headless.
Fortunately I had a version (with a blue and not a red power led)
which seemed to be stable to use as a reference for typing things blindly.
Recently I lost - due to an update to Ubuntu 17.04 - access to this one
machine, so I had to boot it from a rescue image.
But how can you select to boot from a rescue image if you cannot get any display
output on such a machine? The solution was using a default USB-Ethernet adapter,
typing some things blindly, and booting from an arch-linux install cd.
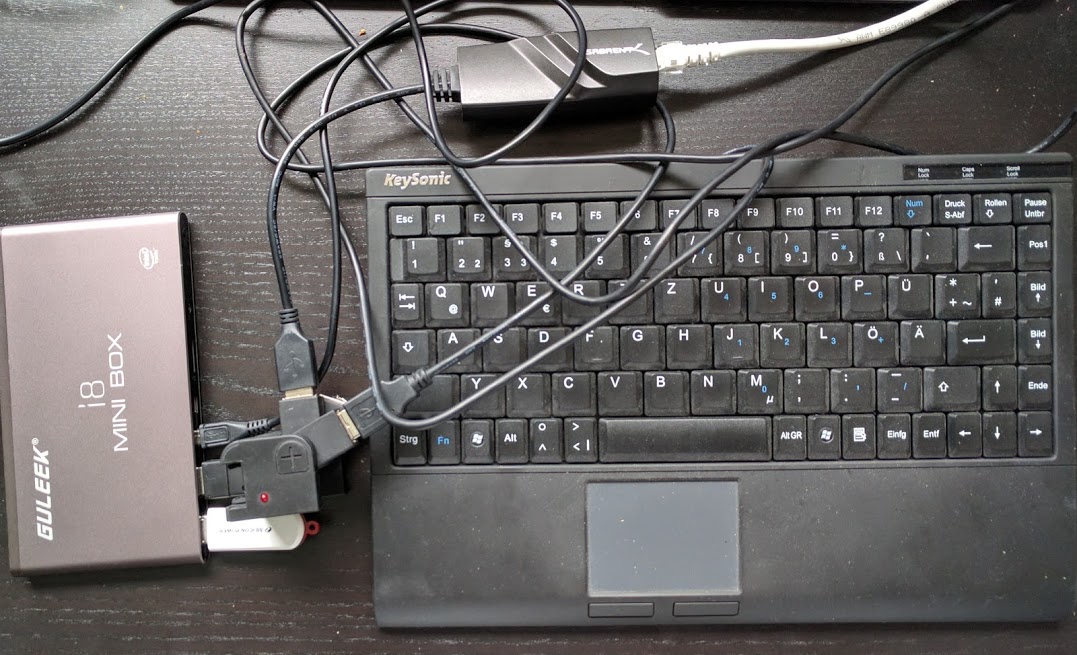
To boot from an external device, try to do the following:
Make sure the GULEEK is powered off (you might have to disconnect
everything and press the power button for approximately 20s until the power led is off)
Attach a simple but verified working USB-hub with a USB-Ethernet
adapter and a USB keyboard attached to one of the USB ports of the GULEEK
and USB-Stick with a flashed
arch install image
to the other.
Make sure the keyboard and USB stick have LEDs so you can get at least some
feedback. Compare with the initial image in this article.
Press power on button until the power led turns on and keyboard leds all flash on, continue
quickly to next step.
There are now two possibilities to get into the rescue system, try and see, which one works:
Via boot menu:
Directly start pressing F7 repeatedly (for about 7s, this should
enter the boot menu)
Directly start pressing del repeatedly (for about 7s, this should enter bios menu)
Press left, up, up, up, return
Wait for numlock light to turn off (activity led on usb stick
should flash a lot before that, then no activity for a while).
If you can monitor your router/DHCP server, wait to see that an IP was requested.
Now press the following (stuff in square brackets is comment, ignore):
return [confirm welcome menu]
return [confirm another menu]
9 [select exit to shell]
return [go to shell]
3
return [enter first password, it will be 3]
3
return [confirming password]
Now check your IP from router or guess it and ssh myip -l root
Enter 3 as password.
Hopefully you are now in the arch rescue system
Use fdisk -l and mount /dev/mmblk1p3 (last number might vary)
to access existing data or partitions.
You can also follow the
Arch Installation Guide
to install here Arch from scratch.
Don't forget to install openssh and enable ssh access (create authorized_keys in .ssh
with correct permissions) to have access later.
Another option is to use a 32-bit version of the
system rescue CD, this could even allow you to gain access just via serial USB.
Careful, you really have to try to connect with 9600 or 38400 baud.
If you want to connect with 115200 baud, you have to build your own systemd service file
as described here: http://0pointer.de/blog/projects/serial-console.html
If you happen to have a real FTDI serial USB adapter, you can even enable serial
at the EFI-prompt. For this you need the following 32-bit efi drivers:
FtdiUsbSerialDxe.efi
TerminalDxe.efi
Create a file startup.nsh with approximately the following content:
echo Activating serial terminal
load fs0:\efidrv\TerminalDxe.efi
load fs0:\efidrv\ftdi.efi
echo Serial terminal activated.
pauseecho Loading Grub
fs0:\EFI\boot\grub.efi
Copy these to the root and into an efidrv directory on the ESP partition
and use efibootmgr to
select with the -n option a one time boot to test-boot into the built-in shell.
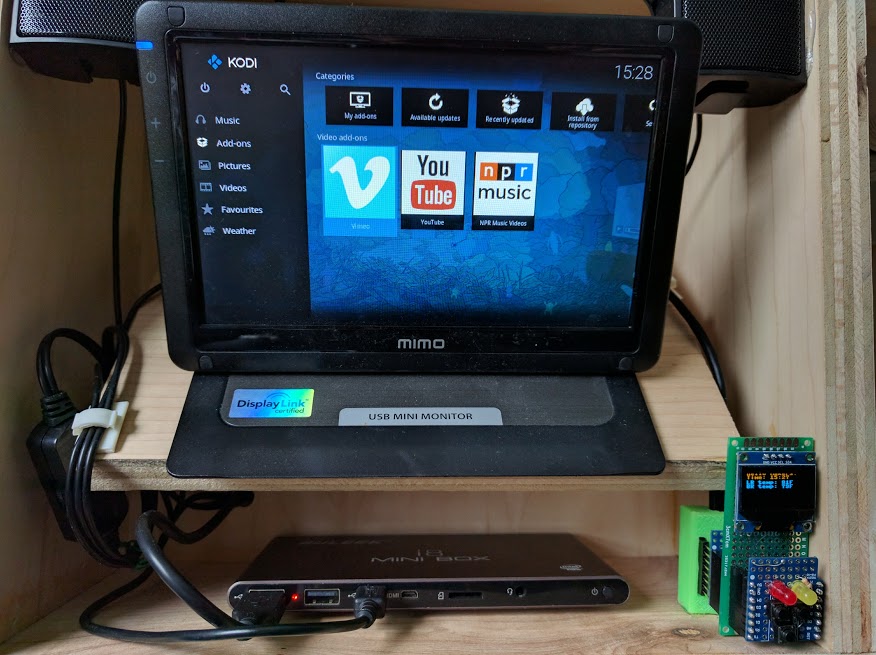
Guleek now in the
eHomeDemonstrator 3,
running router, gateway, and media-center
(kodi) software
As you see in the picture, I attached to my now headlessly installed machine a Display Link driven USB display
(an old 7 inch MiMo Monitor). It basically just works, but might have to be enabled
via xrandr or arandr (to switch away from the broken intel display output).
Something like this should do the trick:
You can use any old monitor with the adapter I linked below.
Inspite of these hassles, I still think these machines are still a tremendous value for money. If you are interested in picking one up (only seeing a slightly more expensive successor offered at the moment) and supporting me, please click on the affiliate links below.
Let me know if you want to read more like this and share your ideas in the comments.